The official release of PwnageTool 4.0 for creating custom ipsw files for iOS 4.0 is now LIVE! The infamous iPhone Dev-Team has updated their PwnageTool for Mac to make it compatible with the newly released iOS 4 for iPhone 3GS, iPhone 3G and iPod touch 2G (non-MC model only). The custom .ipsw firmware files created with PwnageTool can update iPhone to iOS 4 without updating its baseband. iPod touch 2G MC model and iPod touch 3G is currently not supported.

Some important notes from Dev-Team’s blog. MUST READ:
iPhone 3GSThe following step-by-step instructions will help you jailbreak your iPhone running on iOS 4 with PwnageTool 4.0.
Summary: Currently, PwnageTool only works on previously jailbroken 3GS devices with the old bootrom.
iPhone 3G
- If you have a Jailbroken iPhone 3GS with the OLD BOOTROM and you DID NOT use Spirit to jailbreak then you can create the ipsw with PwnageTool 4.0 and restore with your jailbroken recovery mode.
- If you have an iPhone 3GS with the NEW BOOTROM this is NOT supported by PwnageTool 4.0
IMPORTANT! Whenever you need to enter DFU mode, you will need to do so using PwnageTool.
- If you have a Jailbroken iPhone 3G at 3.1.2 (but not jailbroken with Spirit) then you should create the ipsw with PwnageTool 4.0 and restore from recovery mode or DFU mode.
- If you have an out of the box iPhone 3G you should restore using a PwnageTool 4.0 ipsw using DFU mode.
- If you have a Jailbroken 3.1.3 iPhone 3G it is very possible that this can fail from recovery mode, if this failure happens you will need to restore using DFU mode.
- As an alternative to PwnageTool, you can use redsn0w on iPhone 3G (on both Windows and Mac) as mentioned in our last post.
iPod touch 2G
- If you have an iPod touch 2G (non-MC model) that is jailbroken (but not with Spirit) then you can restore using recovery mode.
- As an alternative to PwnageTool, you can use redsn0w on non-MC iPod Touch 2G (on both Windows and Mac) as mentioned in our last post.
Step 1: Download and install the latest version of iTunes.
Step 2: Now start iTunes and sync your iPhone with your PC so that it backs-up all your important data including settings, apps, music, contacts and photos.
Step 3: Download PwnageTool 4.0 and the original iOS 4.0 for your version of iPhone or iPod touch (download links given below). Move all these files to your desktop.
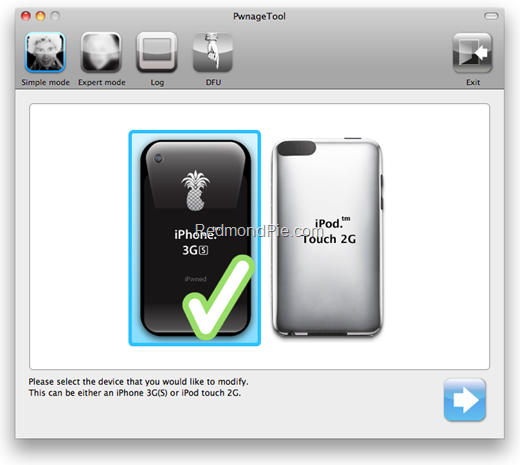
Step 4: Start PwnageTool 4.0 and select your device:

Step 5: PwnageTool 4.0 will now automatically detect the correct firmware for your device as shown in the screenshot below:

Step 6: Click on "No" when PwnageTool asks you “Do you have an iPhone contract that would activate normally through iTunes?”:

Clicking on “Yes” will update your baseband to the latest version. Click on “Yes” only if you are on an officially supported carrier like AT&T.
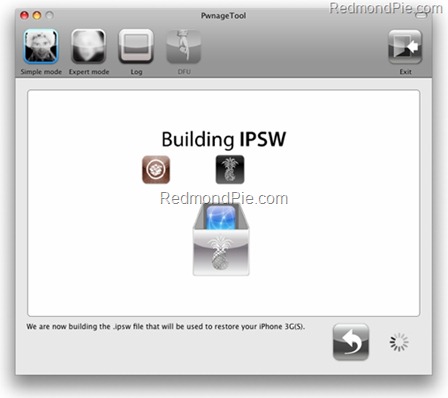
Step 7: PwnageTool will now create the custom .ipsw file for your iPhone which will be jailbroken.

The following “ihaz Success” screen will confirm that the requested .ipsw file has been created successfully.

Step 8: Once the .ipsw file has been created, you will now have to restore your iPhone to this custom firmware 4.0 that you just cooked using PwnageTool 4.0 for your iPhone or iPod touch. Click on your phone icon from the sidebar in iTunes. Now press and hold left “alt” button (“Shift” button on Windows) on the keyboard and then click on “Restore” (Not “Update” or “Check for Update”) button in the iTunes and then release the “Shift” button.
This will make iTunes prompt you to select the location for your downloaded custom firmware 4.0. Select that custom .ipsw file and click on “Open”.
Step 9: Now sit back and enjoy as iTunes does the rest for you. This will involve a series of automated steps. Be patient at this stage and don’t do anything silly. Just wait while iTunes installs the new firmware 4.0 on your iPhone. Your iPhone screen at this point will be showing a progress bar indicating installation progress. After the installation is done, iPhone will restart automatically and you should now have a fully jailbroken iPhone running on iOS 4.
How to: Unlock iPhone on 4.0 (Any Baseband): Follow the complete step by step guide posted here to unlock iPhone 3GS and iPhone 3G, on iOS 4, on any baseband using Ultrasn0w 0.93.
Step 10: Once you are done with the unlocking and jailbreak process. You can now restore all your settings, apps, music, contacts and photos to the newly installed firmware version 4.0 by restoring the backup that you made in Step 2 from iTunes.
Alternate Guide for iPhone 3G and iPod touch 2G: Alternatively, iPhone 3G and iPod touch 2G (non MC model) users can use the latest version of Redsn0w too to jailbreak their iOS device on iOS 4. Step by step guide is posted here.
Disclaimer: This guide is for testing & educational purposes only. Follow it on your own risk. I’m not responsible for any loss of important data or malfunctioning of your iPhone.
Feel free to ask me any question here should you run into any problem during the jailbreak process.
Download iTunes 9.2 for Windows and Mac OS X
Download iOS 4 for iPhone 3GS, iPhone 3G and iPod touch
Download PwnageTool 4.0 for Mac OS X
You may also like to check out:
- Unlocked iPhone 4 Available in UK, France and Canada
- How to Jailbreak iOS 4.0 on iPhone 3GS, iPhone 3G and iPod touch 2G
- How to Unlock iOS 4 with Ultrasn0w and Blacksn0w on 05.13.04 Baseband
Source: redmondpie
0 comments:
Post a Comment